Scheduling a data pipeline
We often need to schedule pipelines for routine tasks. For example, connecting to a data source each morning at 8am or sending out a report at 2pm every Friday. This guide is about how to build and manage scheduled data pipelines.
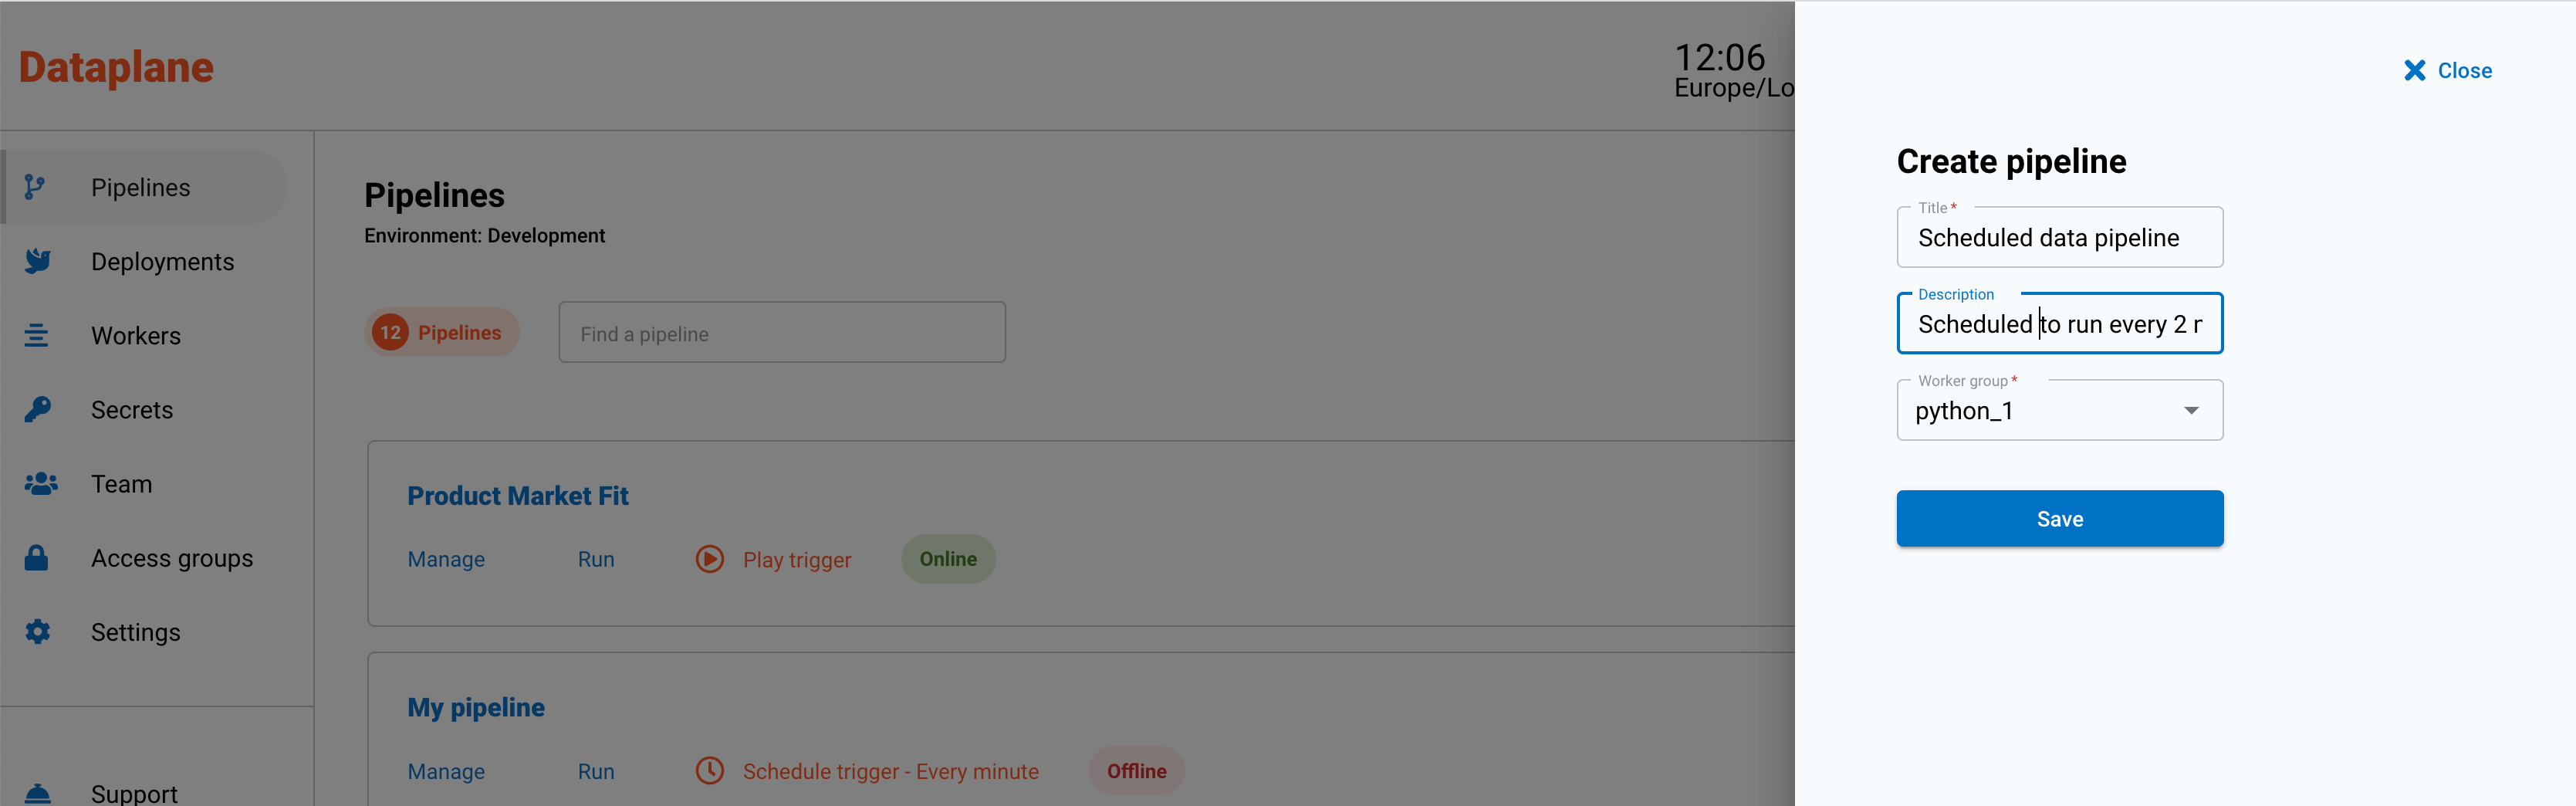
Create a scheduled data pipeline
Go to Pipelines and click the Create button.
A sidebar will open up and will ask for a name, description and worker group.
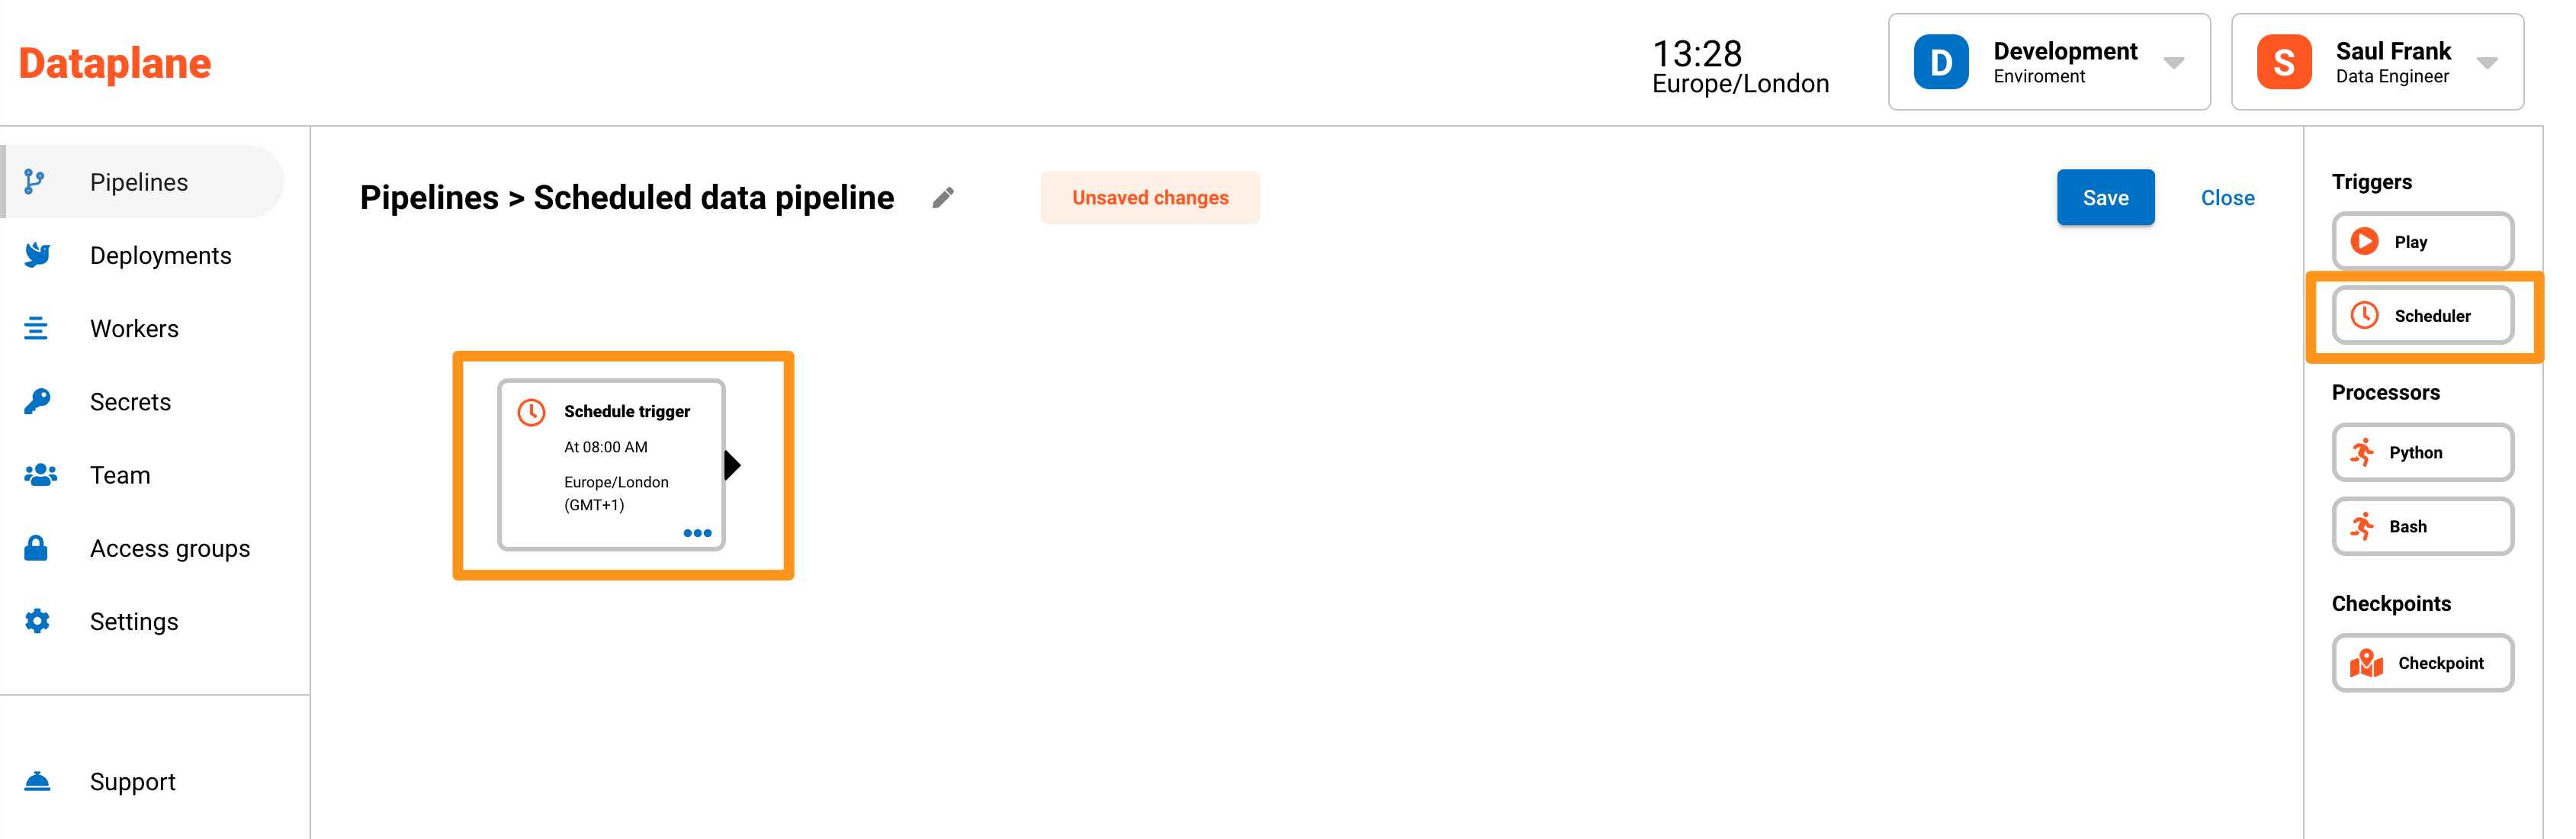
Choose the Scheduler trigger
Drag the Scheduler trigger onto the pipeline canvas as the first component of your data pipeline.
Configuring the Scheduler trigger
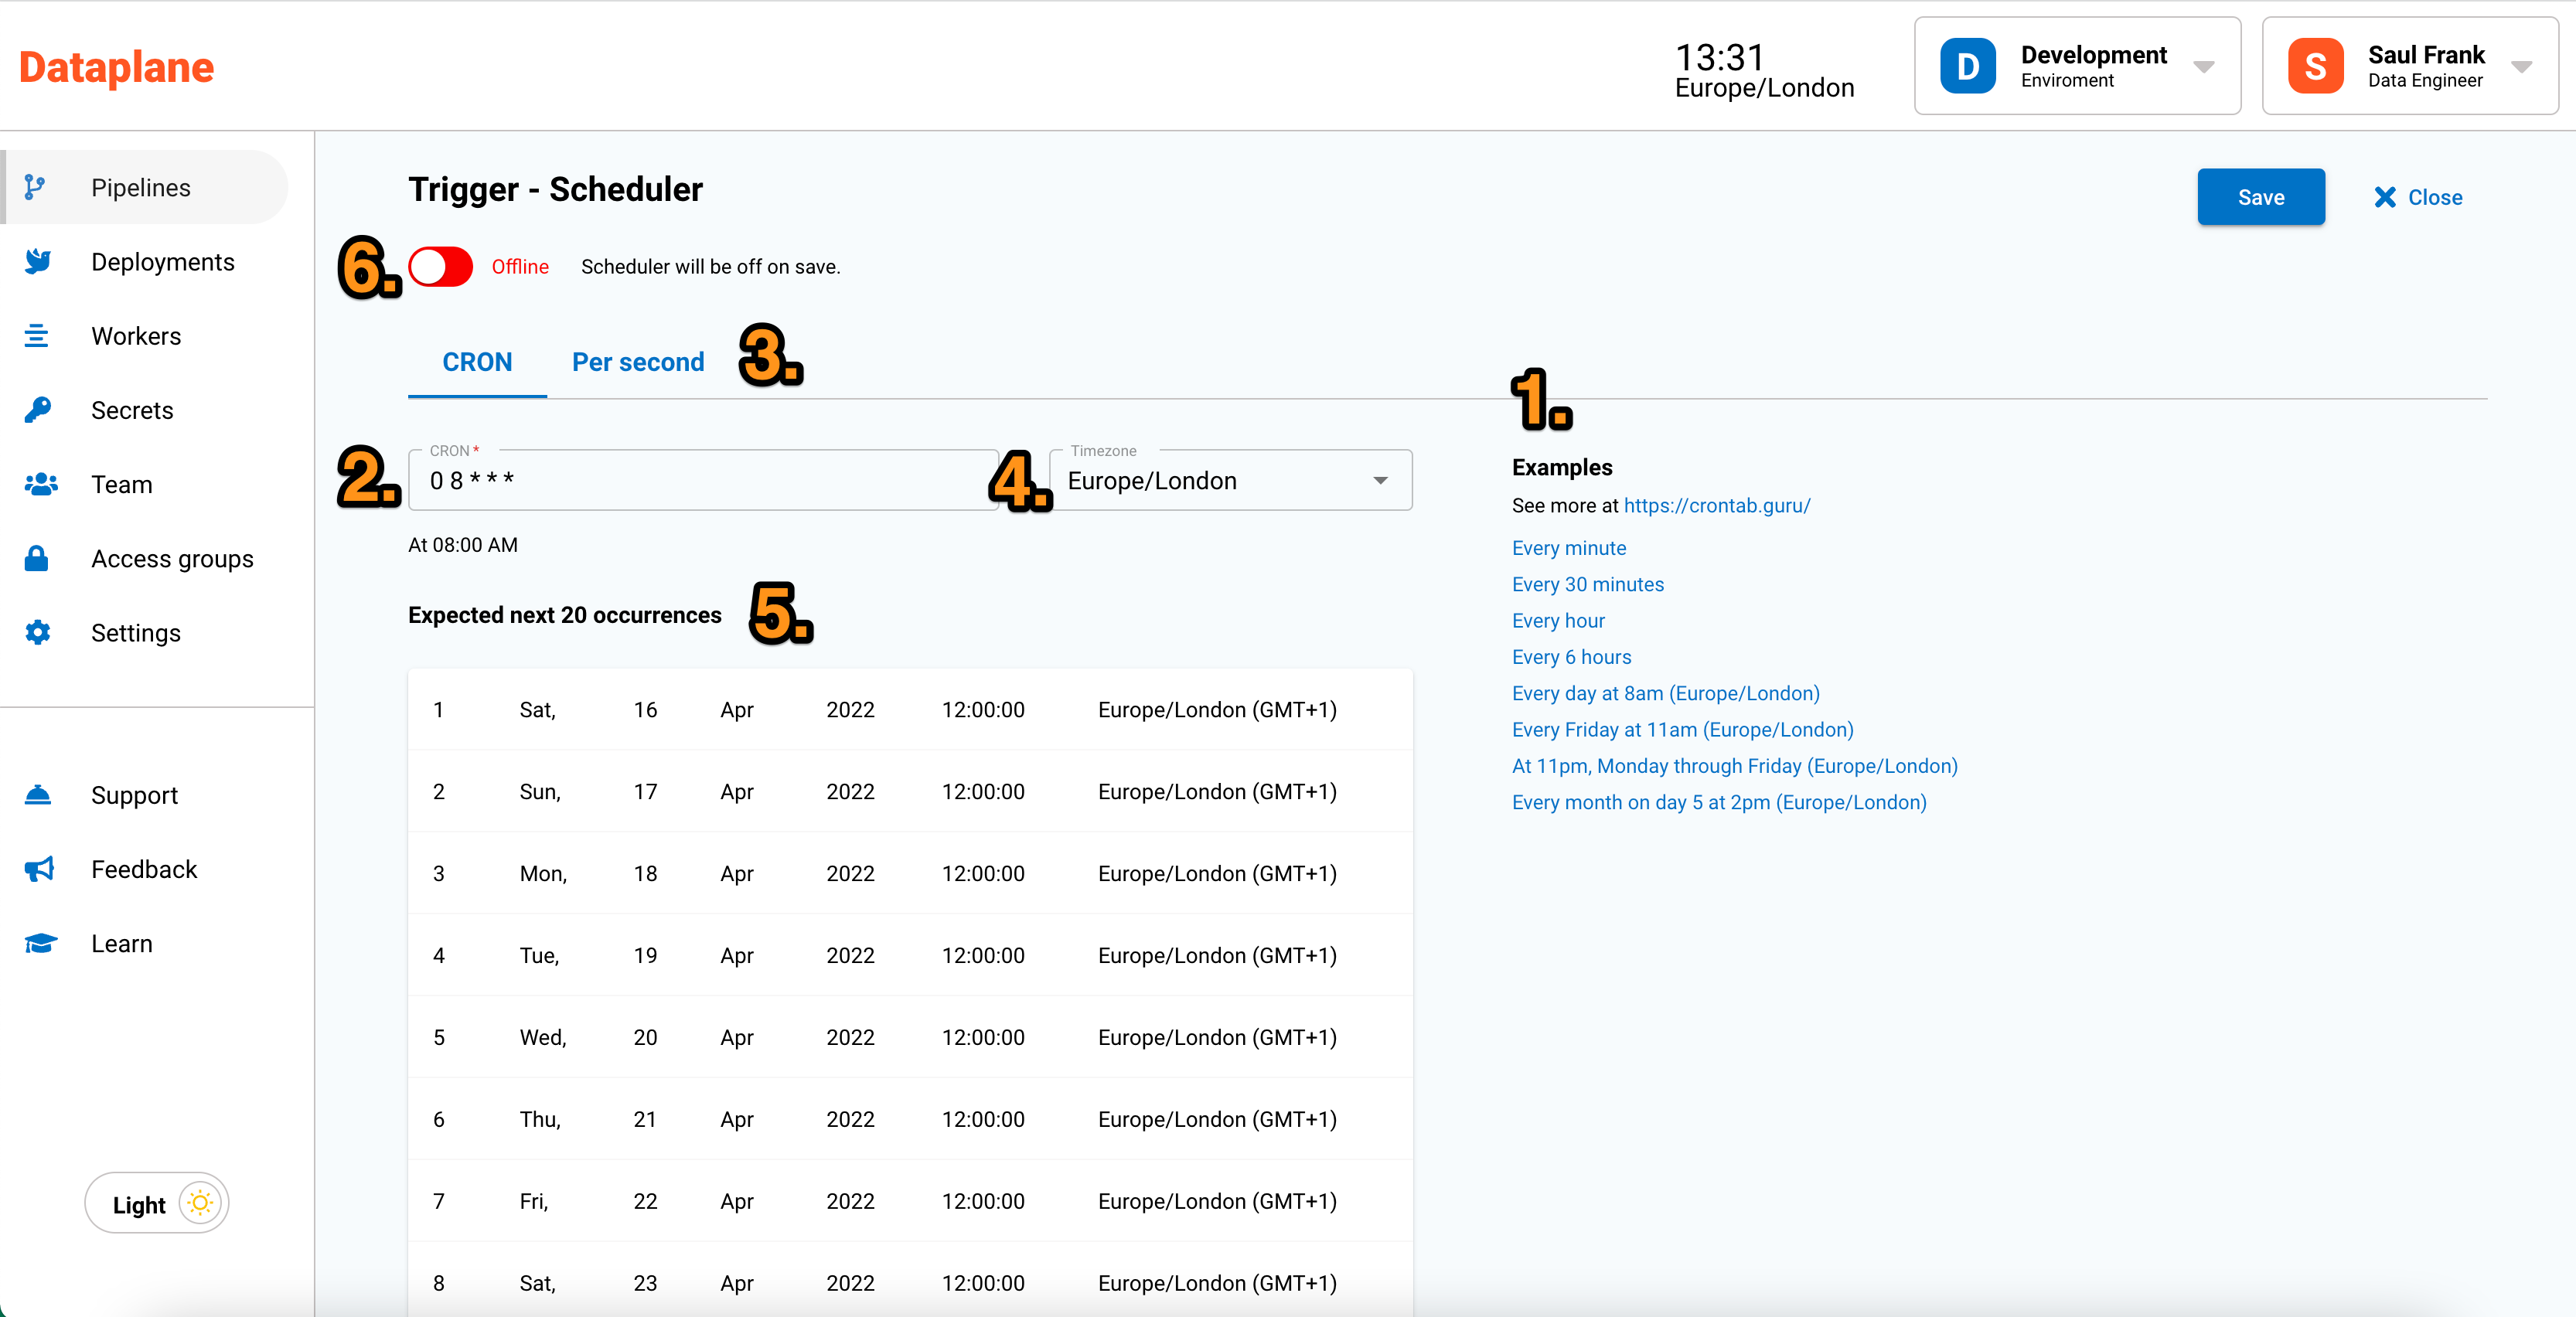
When you drag and drop, a page opens to configure the scheduler. At any time, you can edit the scheduler by clicking the menu dots on the scheduler and then clicking Scheduler in the menu.
| Point | Configuration | Notes |
|---|---|---|
| 1 | Examples of CRON schedules | These are commonly used CRON scenarios for scheduling your pipelines. Click on the example and alter the CRON syntax by point 2 to meet your needs. |
| 2 | CRON input box | You can use the CRON syntax to schedule your pipelines. |
| 3 | Per second scheduling | CRON cannot run more frequently than per minute scheduling. Dataplane has a per second scheduler, but it is recommended that 3 seconds is the most frequent schedule. See below for more information on leader election and distributed locking. |
| 4 | Time zone | With Dataplane, you can set the time zone for the scheduler. Unless changed, the time zone will default to the time zone provided in settings. |
| 5 | Preview | The preview gives you the next 20 occurences of the schedule. This can be helpful to check the expected interval of the scheduler. |
| 6 | Online and offline | You can turn the scheduler on or off. This is useful when you are busy building your pipeline and you don't want the scheduler to run. If turned on, the scheduler will become active when the pipeline is saved. |
Advanced: Avoiding duplication with distributed locking and leader election
Dataplane is made up of the main application and worker nodes. The main application is responsible for the functioning of Dataplane such as scheduling, pipeline graph traversal, user management and so on. The worker nodes are responsible for processing data logic found in the processors.
To allow for cloud native scaling and resilience, the main application which runs the scheduler can have more than one instance running as a cluster, and it is recommended to run three instances as a cluster. You can see an example of this in the Kubernetes installation guide. The Kubernetes deployment yaml does this by setting the replica set to three.
If there are three main applications running, this could also mean there are three schedulers running causing duplicate runs. To solve this problem, Dataplane uses two strategies to prevent duplicate runs while maintaining scaling and resilience capability.
The first strategy is distributed locking. Each time a schedule is run, that run is locked for a period of 1 second which prevents the same scheduler from running more than once at the same time. This is the reason we recommend that per second scheduling is at a minimum a conservative 3 seconds.
The second strategy is leader election. Only one leader can run the scheduler. When the main application starts up, and it is the only instance running, it will elect itself as the leader. If more instances spin up, those instances continue to recognise the elected leader. The leader frequently broadcasts (or boasts) about being the leader to constantly make the other instances aware. If the leader crashes or becomes unresponsive, the other instances will randomly select a leader amongst themselves and the scheduler will be activated on that elected leader.
Changes made to schedules (including removal and online / offline status changes) can only be applied by the leader instance.